Integrating Workday with Compt (Company Administrators)
Setting up the Workday + Compt API Integration
Once you have determined that you would like to set up the Workday Integration, reach out to your Customer Success Manager or support@compt.io to enable the Workday Integration feature for your company. After the feature has been added by the Compt Customer Success team, follow the steps below:
Step 1: Create an Integration System User (ISU)
- In your Workday portal, log in to the Workday tenant
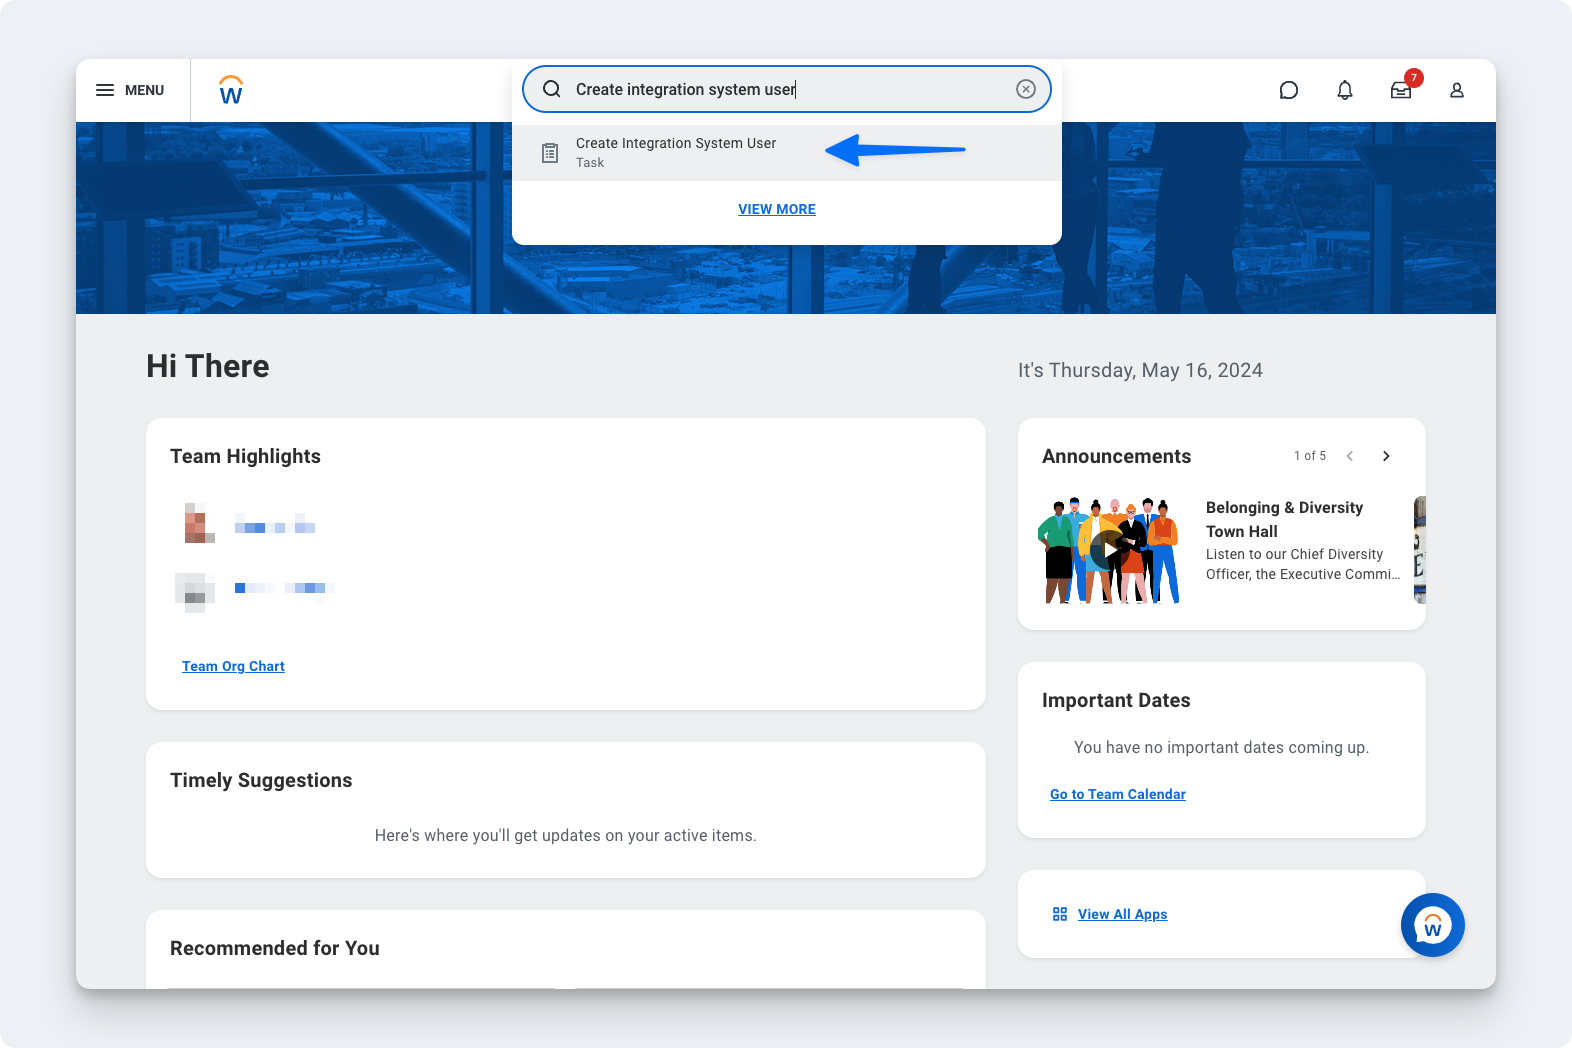
- In the Search field, type Create Integration System User
- Select the Create Integration System User task
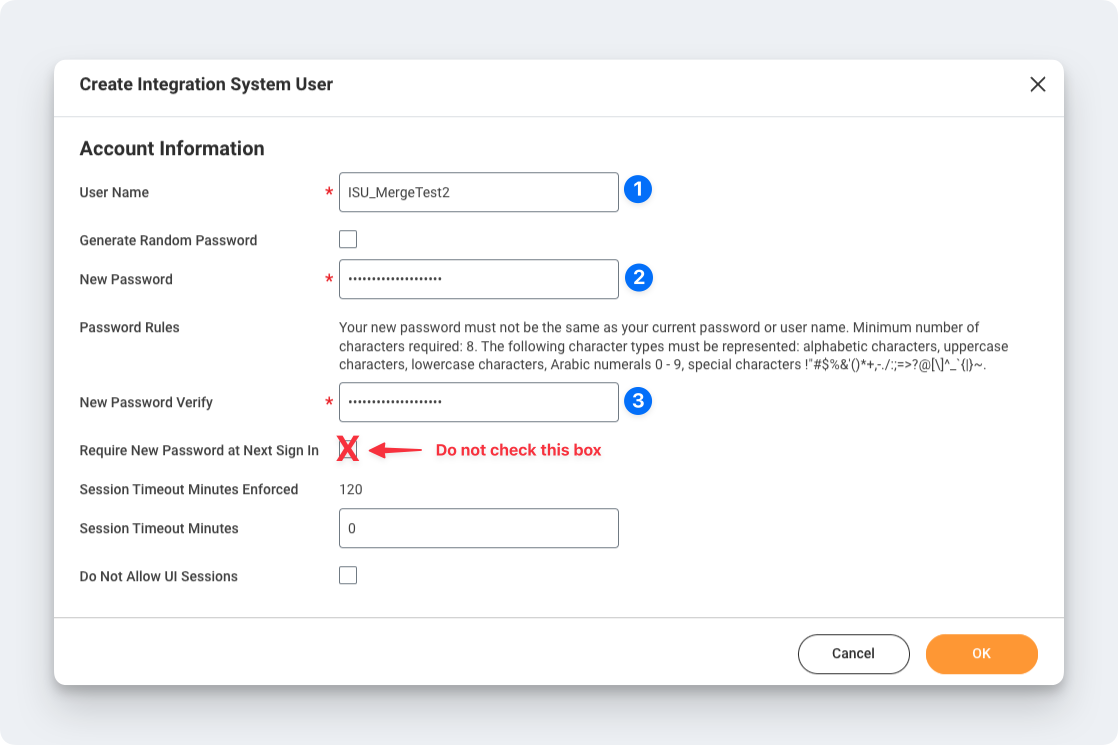
- On the Create Integration System User page, in the Account Information section, enter a user name, and enter and confirm a password
Important: "&", "", or ">" characters cannot be included in the password
- Click OK
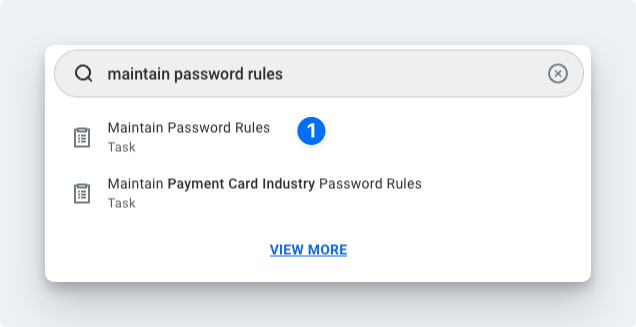
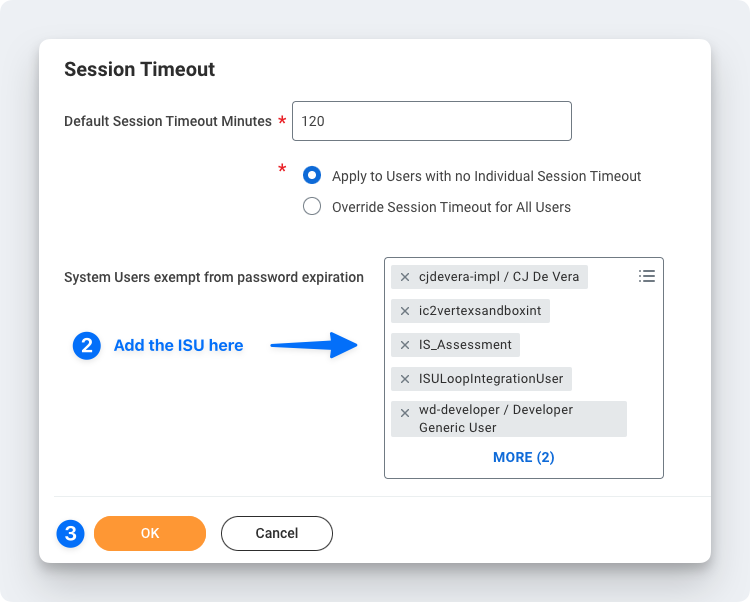
- To ensure the password doesn't expire, you'll want to add this new user to the list of System Users. To do this, search for the Maintain Password Rules task.
- Add the ISU to the System Users exempt from password expiration field
Step 2: Log in to Compt and link your Workday account
- Log in to Compt, click on Stipend Admin → Company Settings, and scroll down to Employee Sync Integration. Then click on Set up integration.

- Select Workday from the list of providers

- Select that you would like to authenticate using your credentials and confirm that you are an admin for Workday.

- Enter the Integration System User name and Integration System User password and click Next.

Step 3: Create a Security Group and assign an Integration System User
-
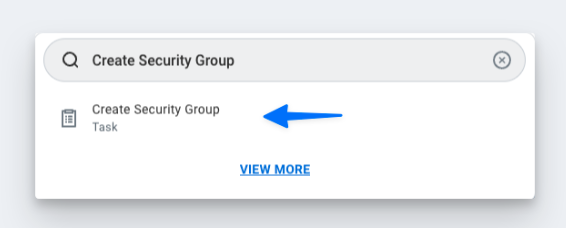
Go back to your Workday portal and in the Search field, type Create Security Group and select the Create Security Group task.
-
On the Create Security Group page, select Integration System Security Group (Unconstrained) from the Type of Tenanted Security Group pull-down menu.
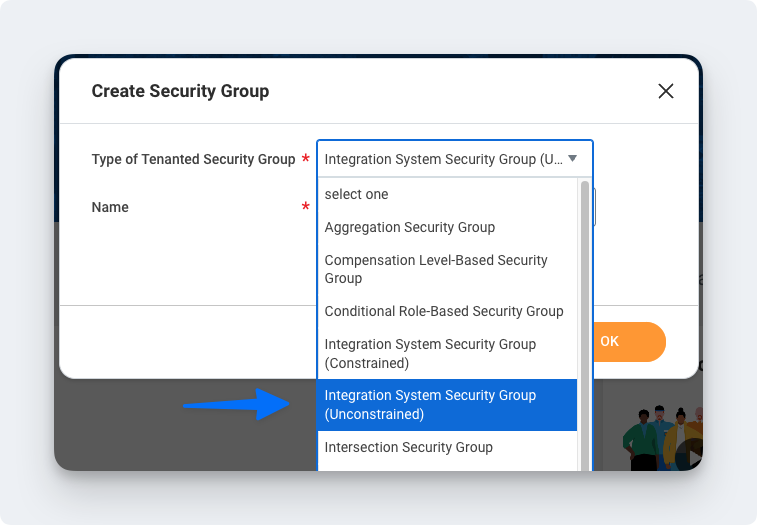
- In the Name field, enter a name
- Click OK
-
On the Edit Integration System Security Group (Unconstrained) page, in the Integration System Users field, enter the same name you entered when creating the ISU in the first section
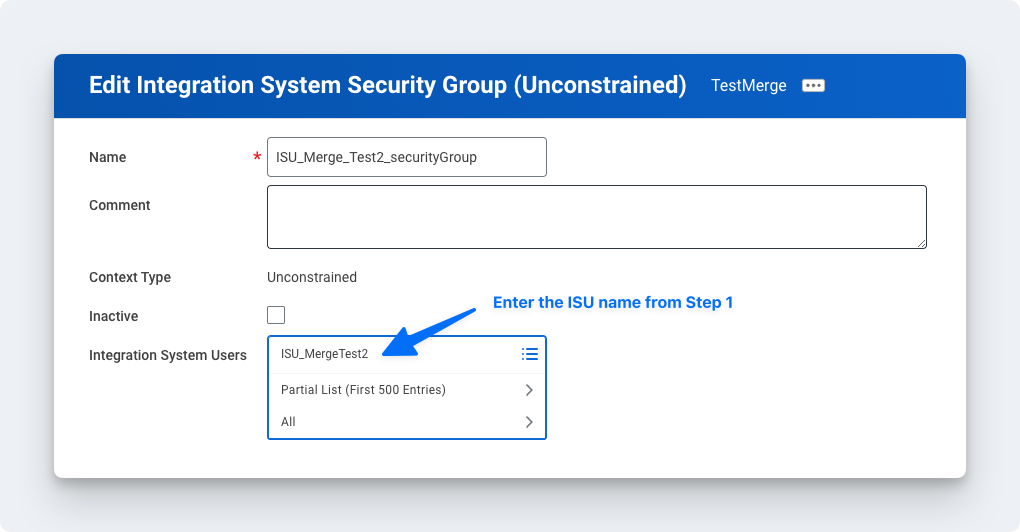
- Click OK

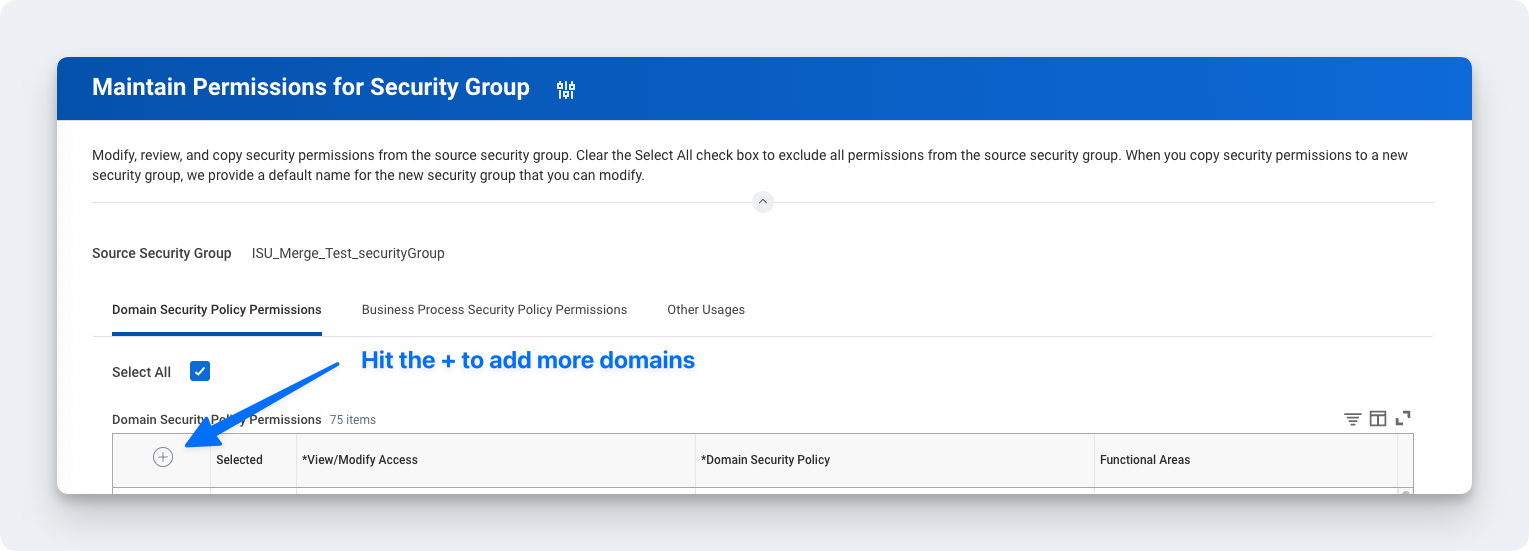
Step 4: Configure domain security policy permissions
-
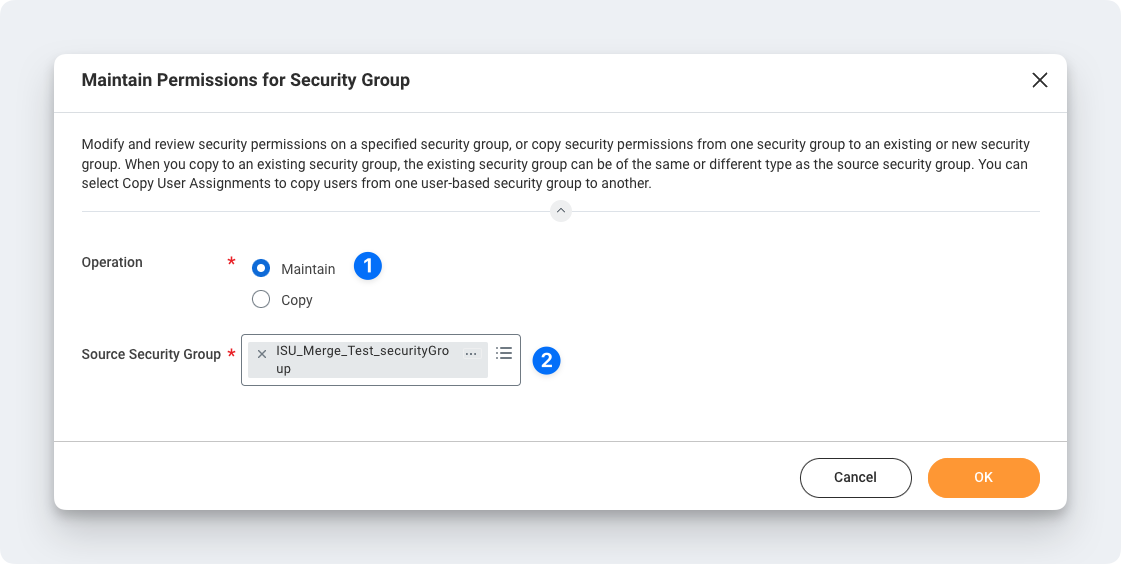
In the Search field, type Maintain Permissions for Security Group

-
Make sure the Operation is Maintain, and the Source Security Group is the same as the security group that was assigned in Step 2
On the next screen, add the corresponding Domain Security Policies depending on your use case:
-
If you are connecting Workday HRIS
-
Step 5: Activate security policy changes
-
In the search bar, type "Activate Pending Security Policy Changes" to view a summary of the changes in the security policy that needs to be approved
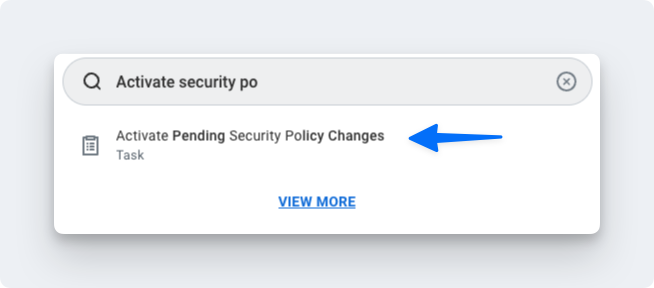
- Add any relevant comments on the window that pops up
-
Confirm the changes in order to accept the changes that are being made and hit OK

Step 6: Validate the authentication policy is sufficient
-
Search for Manage Authentication Policies
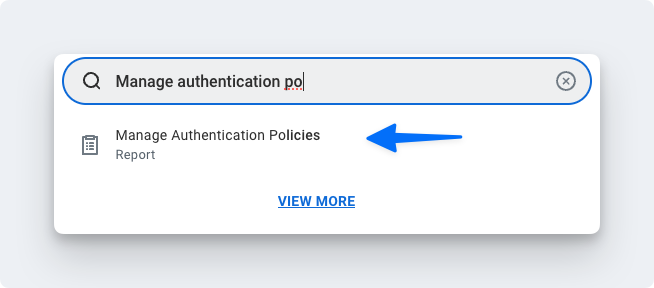
-
Click Edit on the authentication policy row

-
Create an Authentication Rule
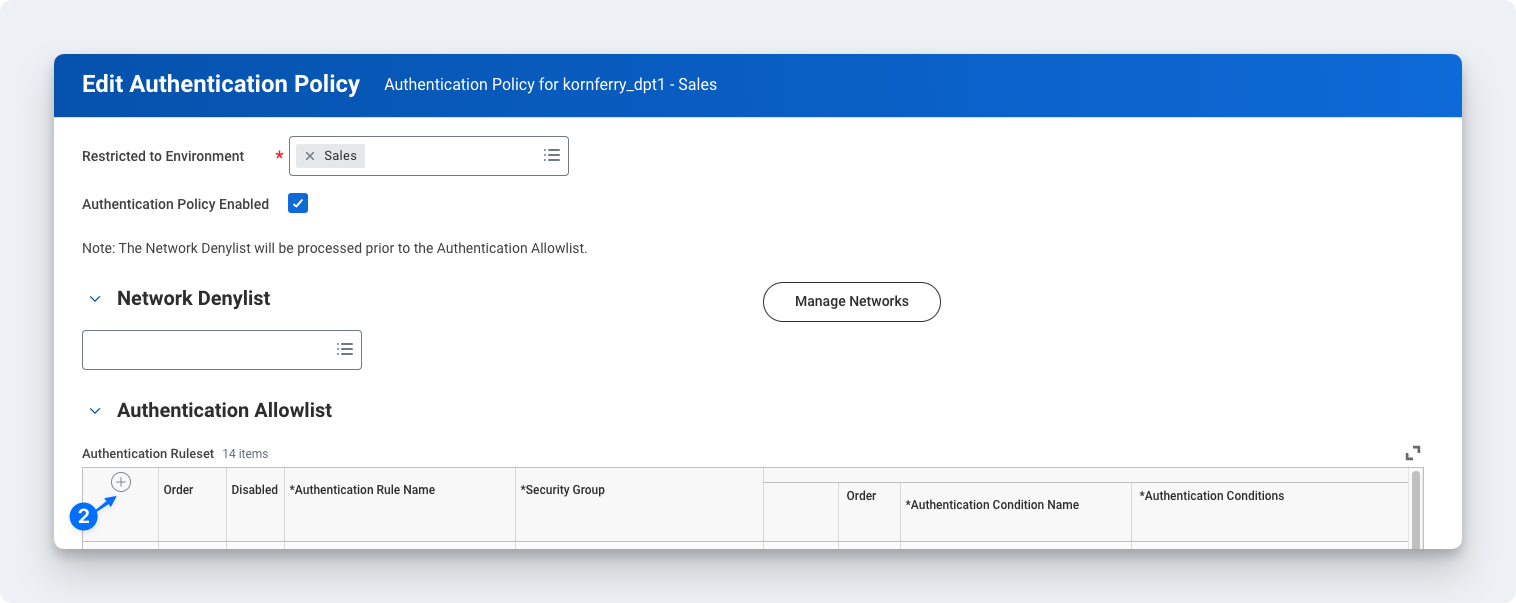
-
Enter a name, add the Security Group, and ensure Allowed Authentication Types is set to Specific User Name Password or Any
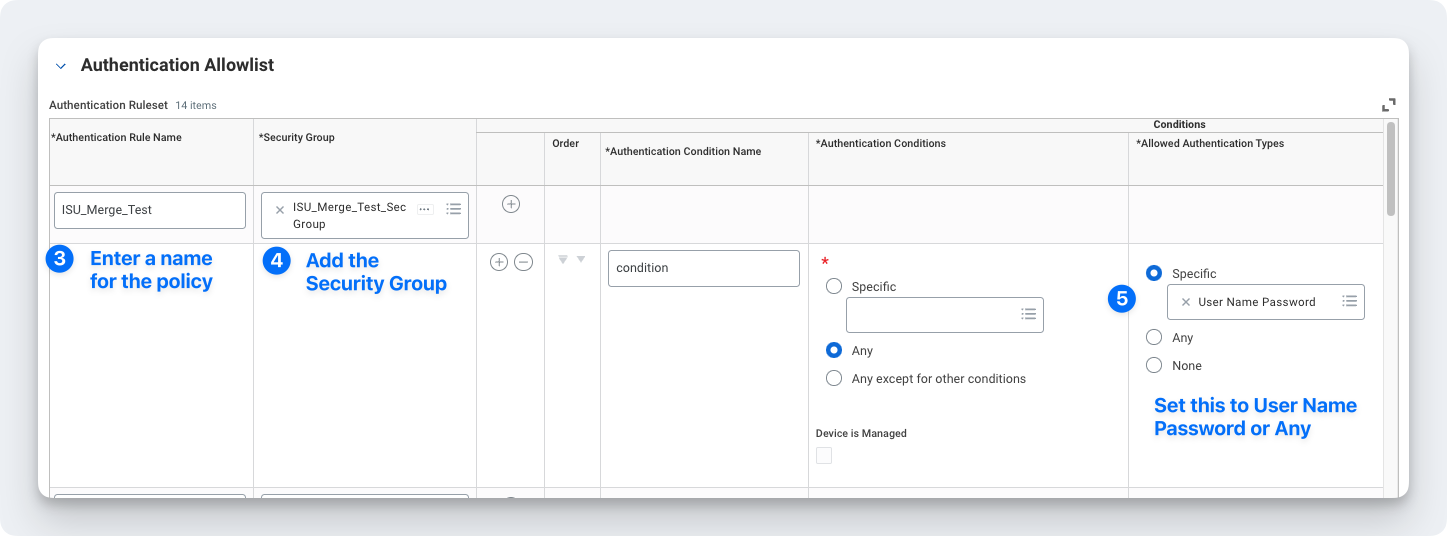
Note: You don't have to create a new Authentication Rule if you already have an existing one set to User Name Password or Any. You can add the ISU you created to that rule instead.
You will need to create a new rule if SAML is the only Authentication Rule you see for "Allowed Authentication Types."
Step 7: Activate all pending authentication policy changes
-
In the search bar type, activate all pending authentication policy changes
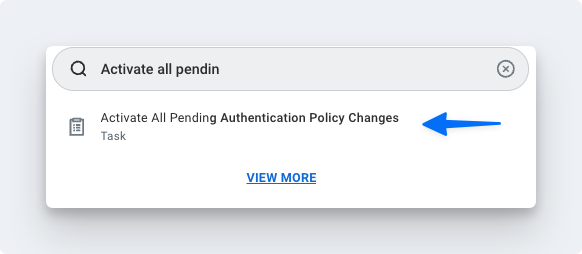
- Proceed to the next screen and confirm the changes. This will save the Authentication Policy that was just created or edited
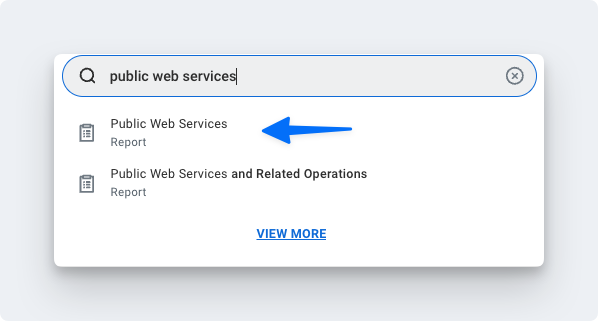
Step 8: Obtain the web services endpoint URL
-
Search in Workday for Public Web Services
-
Find Human Resources (Public) if you are connecting Workday HRIS. Find Recruiting if you are connecting Workday ATS.
Click the three dots to access the menu. Click Web Services > View WSDL
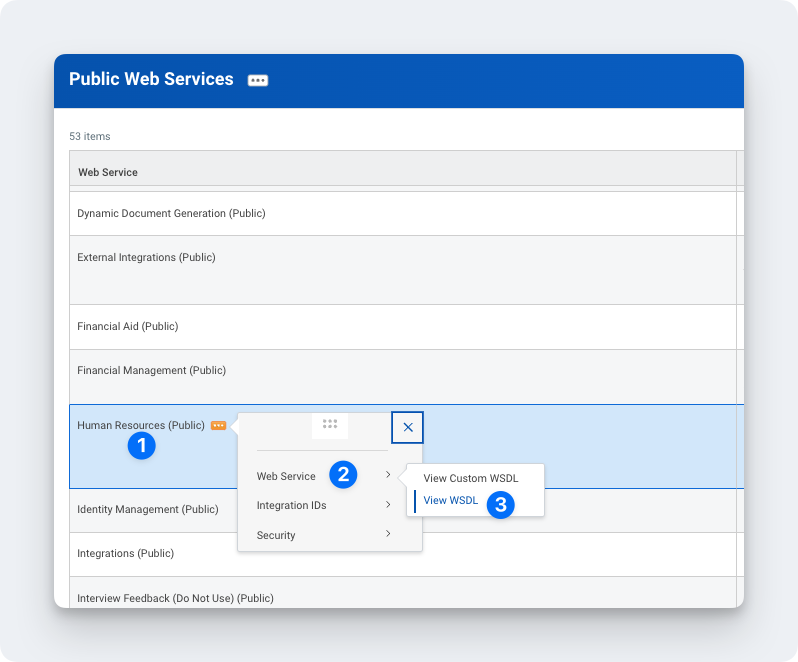
- Navigate to the bottom of the page that opens (it may take a few seconds to load)
-
Copy the full URL provided under Human_ResourcesService (Workday HRIS) or RecruitingService (Workday ATS). The URL will have a format similar to
https://wd2-impl-services1.workday.com/ccx/service/acme/Human_Resources/v43.0
-
Enter the Web Services Endpoint URL into Compt.
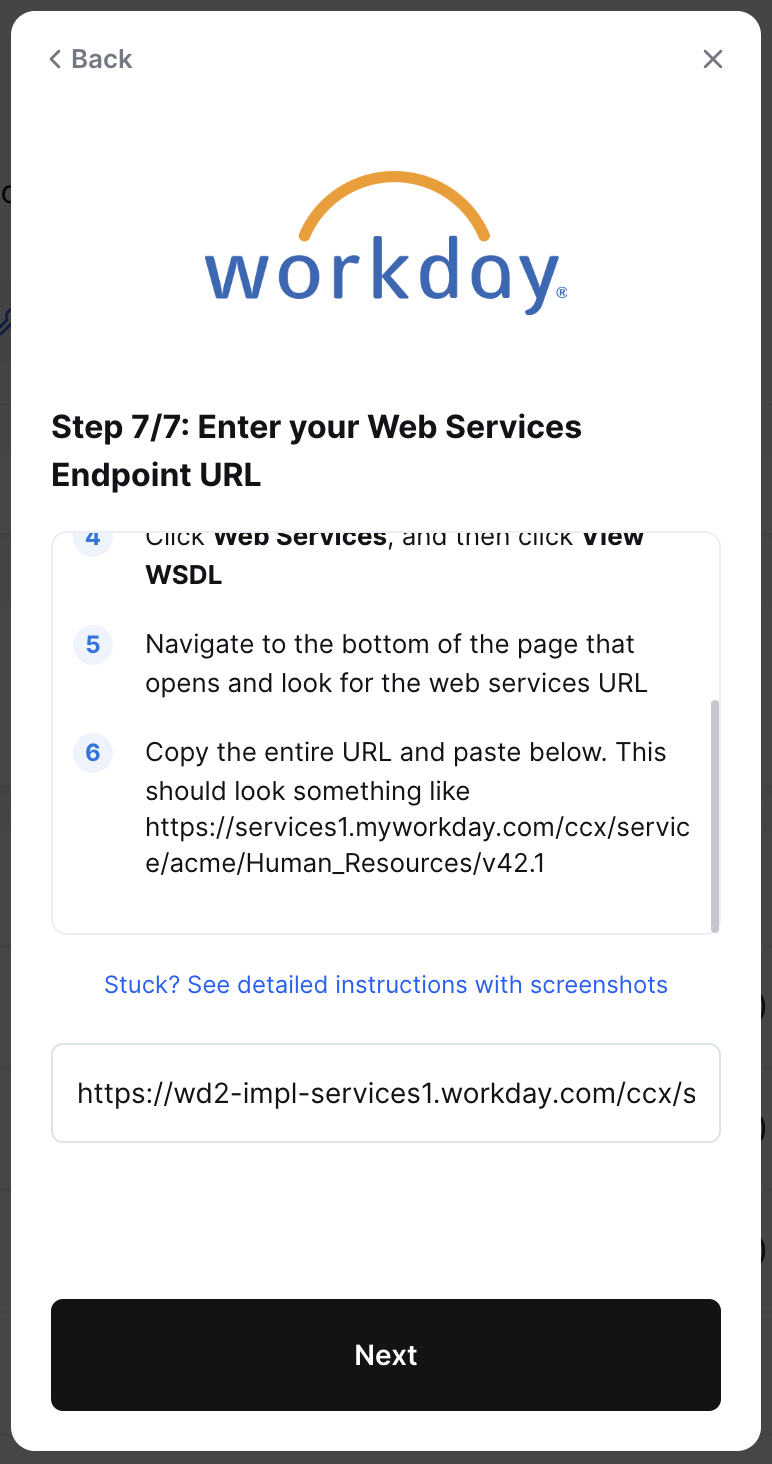
- Click Submit
Please note: When mapping fields, make sure any groups synced from your HRIS that determine stipend eligibility exactly match the group names in Compt—including case sensitivity and spacing. Mismatches can impact stipend funding. To avoid issues, connect with your CSM or support@compt.io before finalizing your field mapping.
Step 9: Confirm the sync
Once your login information has been entered, you will see an option in Compt to trigger the employee sync.
It can take up to 30 minutes for the sync to be complete so make sure to check back that all of the information has been successfully transferred.