Integrating Hibob with Compt (Company Administrators)
Setting up the Hibob + Compt API Integration
Once you have determined that you would like to set up the Hibob Integration, reach out to your Customer Success Manager or support@compt.io to enable the Hibob Integration feature for your company. After the feature has been added by the Compt Customer Success team, follow the below steps:
Step 1: Create the Service User in your Hibob Account
-
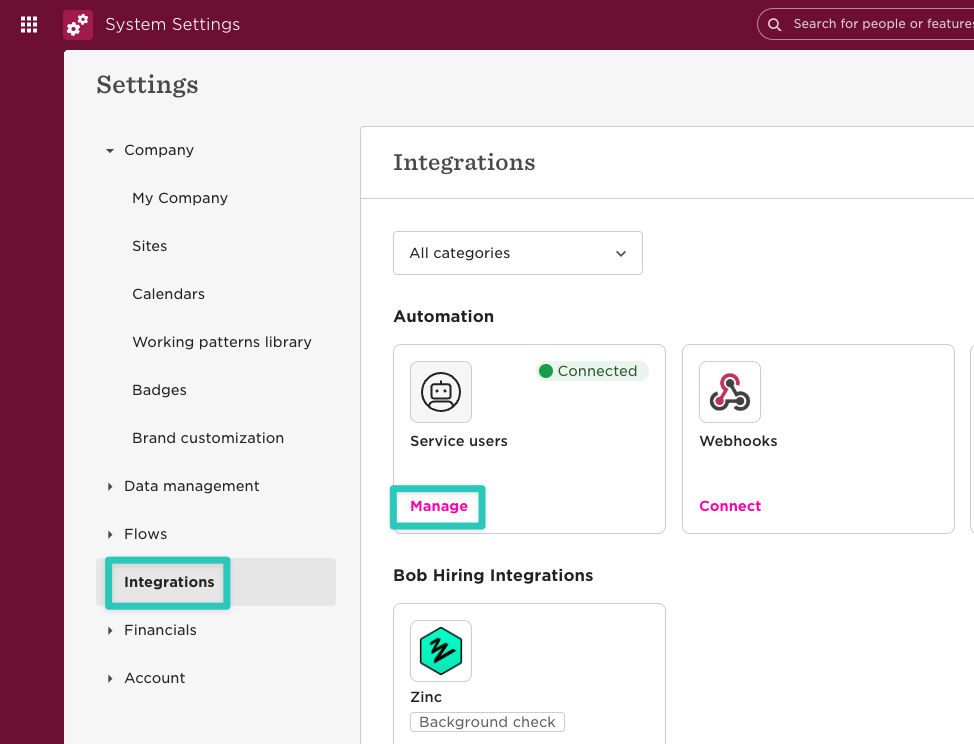
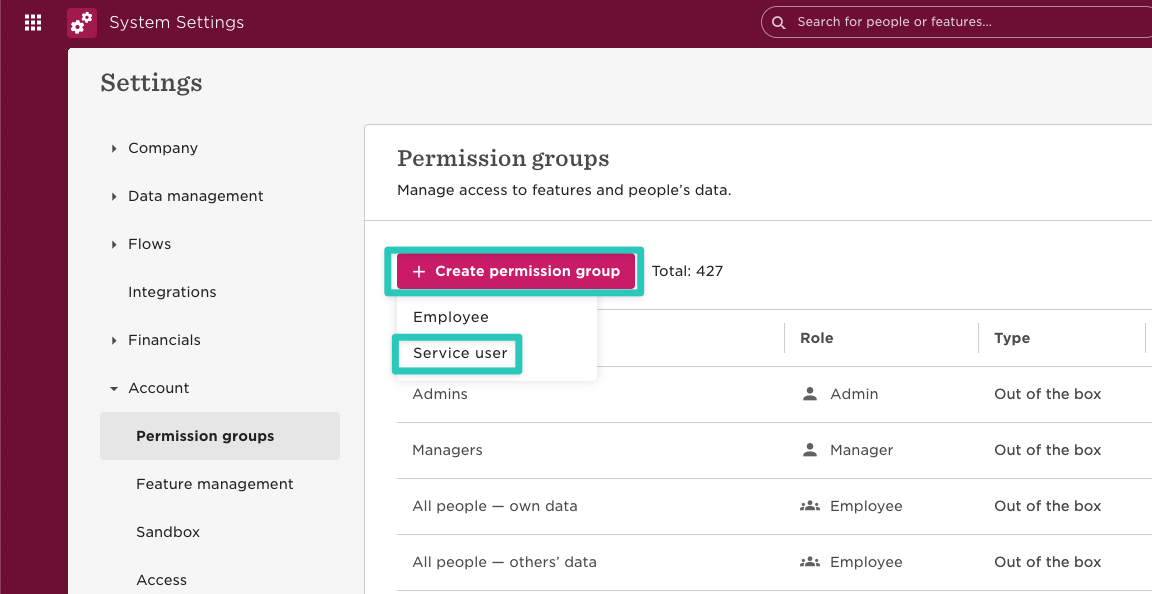
Navigate to your Hibob System Settings

-
On the Settings screen, open Integrations and click Manage on the Service users tile
-
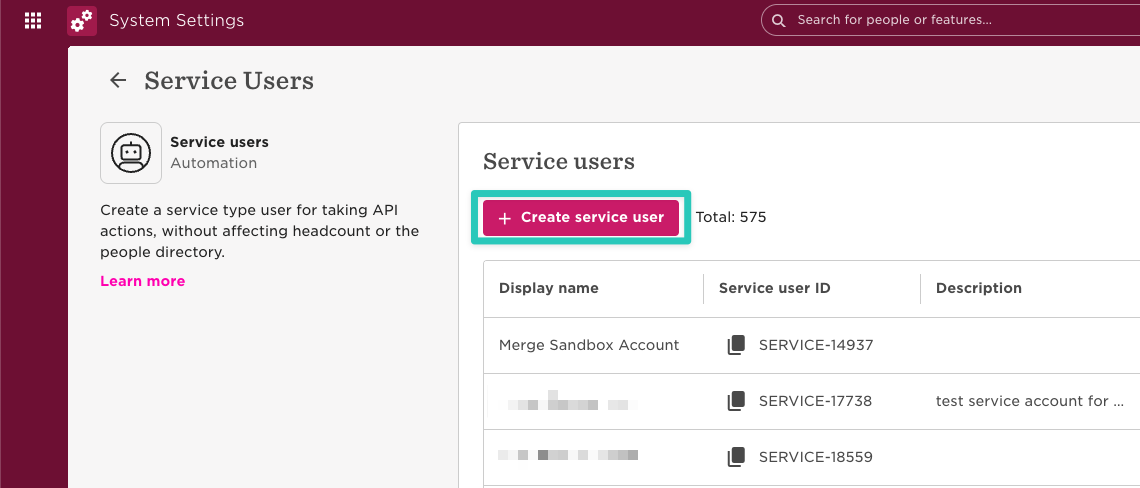
Click on Create service user
-
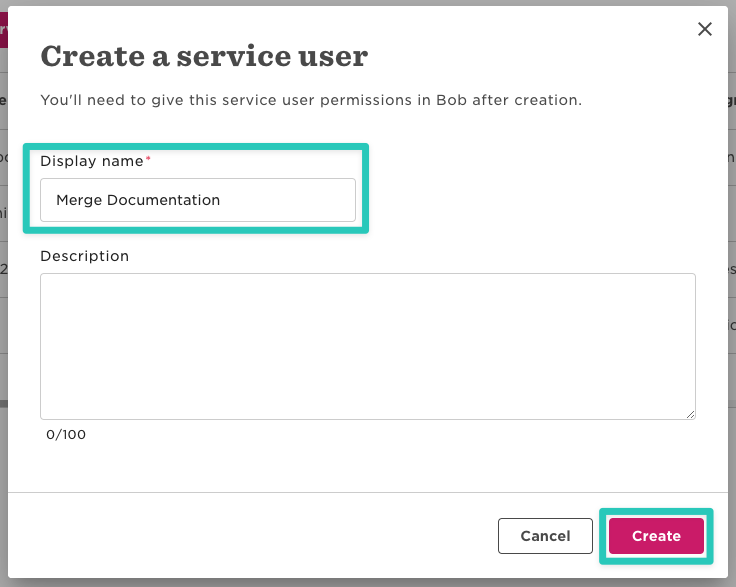
Enter any Display name and click Create
-
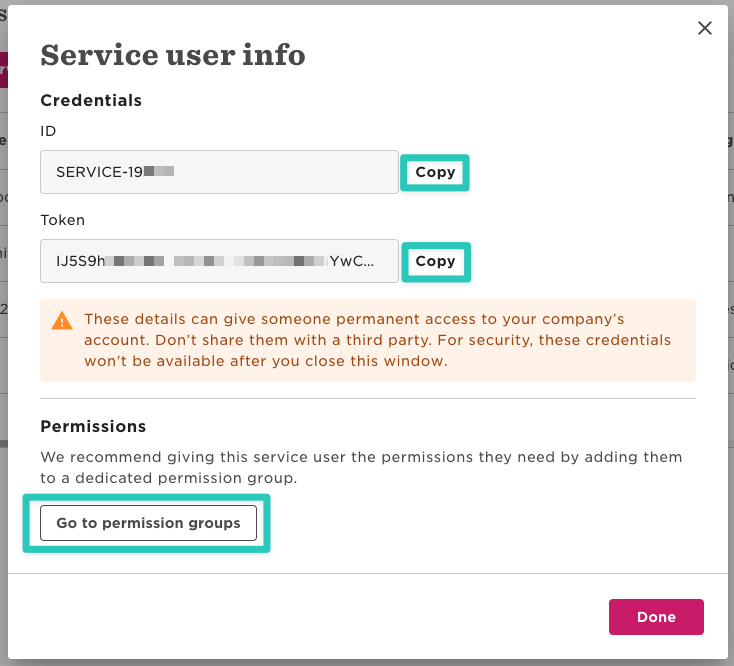
On the next screen, Hibob display the credentials for your new service user. Make a note of both the ID and the Token, then click on Go to permission groups and proceed with the next step
Step 2: Create a Permission Group
-
Click Add permission group, then Service user
-
Enter any Group name, select your new service user under Select service users and click Create
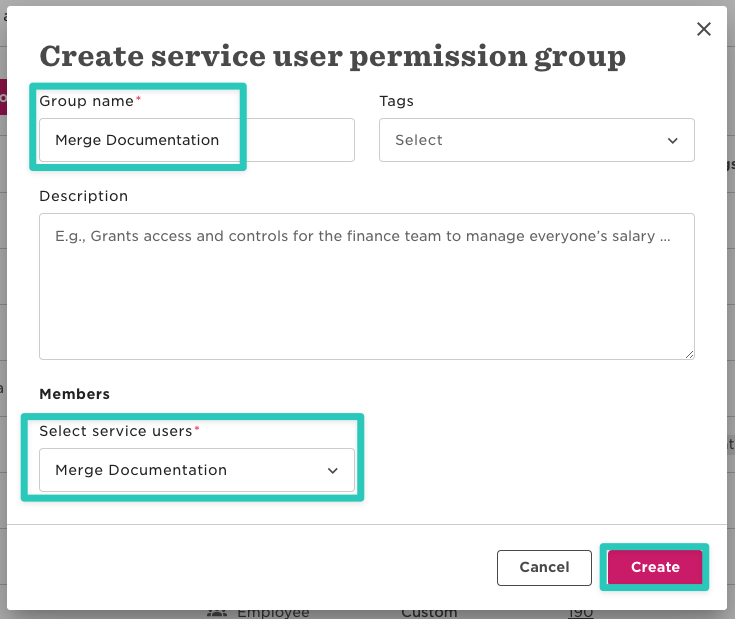
- When asked to confirm the changes, click Confirm
-
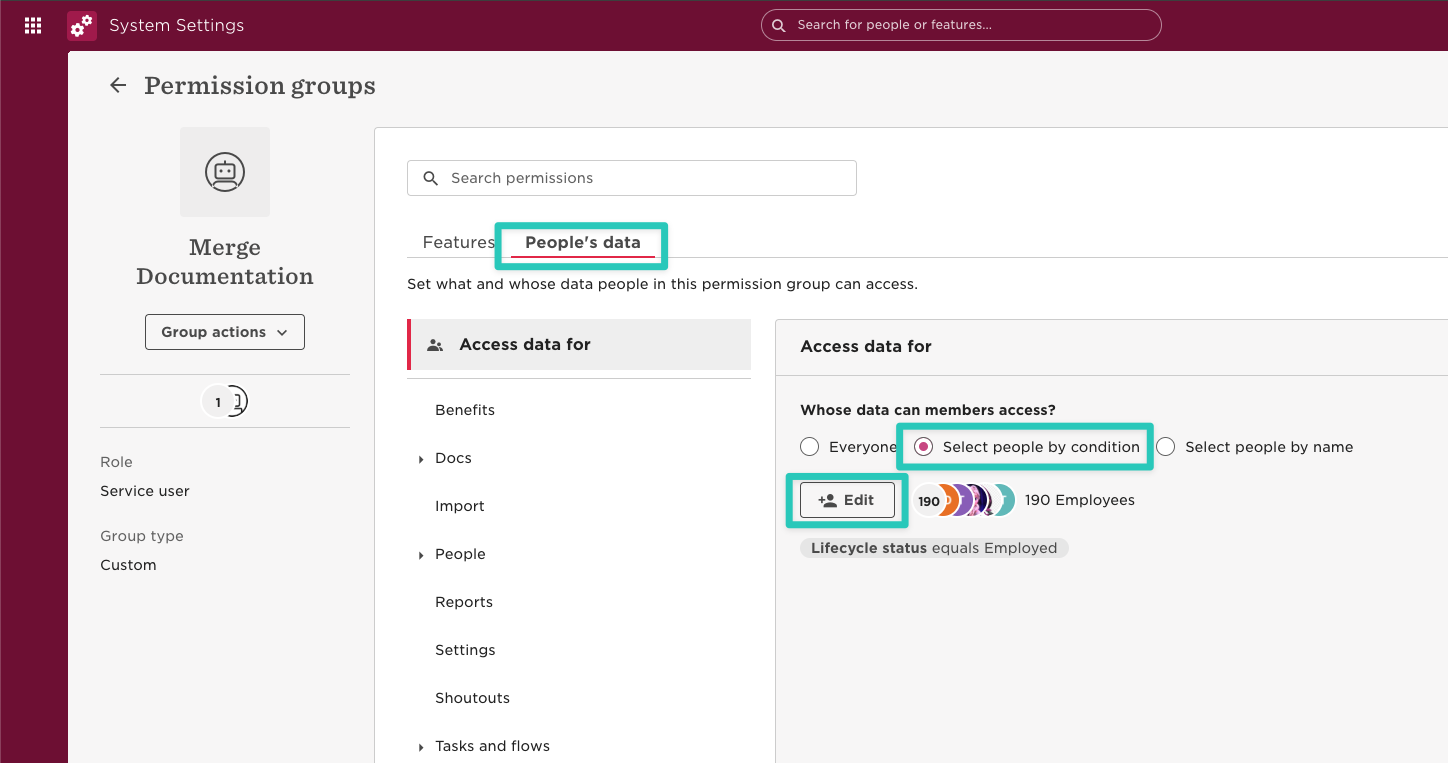
Switch to the People's data tab of the new Permission Group, pick "Select people by condition" under Whose data can members access?, then click on Edit to select the people the integration can access
-
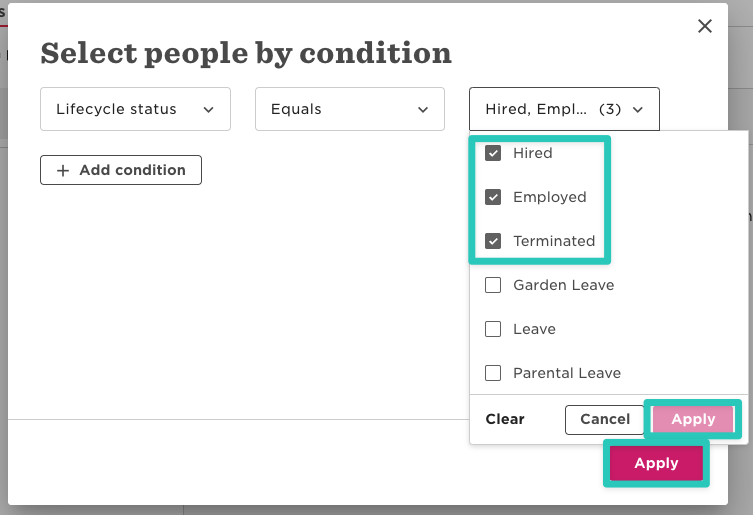
In the Select people by condition pop-up, select all relevant Lifecycle Statuses. In most scenarios this will include Hired, Employed, and Terminated. Click Apply twice once done:
Back in the People's Data add the following permissions based on the required fields you need to share for your integration:
- For each category, select the View selected employees' [Permission] sections permission.
- If you need Date of Birth or the full unobscured SSN, you must include both View and Edit access for the appropriate permission. Note that we will NOT edit any employee sections.
-
Once done adding the above permissions, finish creating the Permission Group by selecting Save.
| Hibob Permission | Associated Fields |
| People > Basic Info (required) | Name |
|
People > Employment People > Work |
Company Employee Number Manager Start Date Termination Date Work Email Work Location Department Job Title Employment Type FLSA Code |
| People > Work contact details | Work Email |
| People > Personal |
Date of Birth (requires Edit permission) Mobile Phone Number |
| People > Personal contact details |
Mobile Phone Number Personal Email |
| People > Home |
Gender Marital Status Personal Email |
| People > Lifecycle | Employment Status |
| People > Identification | SSN |
| People > Address | Home Location |
| People > EEO | Ethnicity |
| People > Payroll |
Pay Rate Payroll Runs |
| People > About | Avatar |
| People > Financial | Bank Information |
| Timeoff > Balance | Timeoff |
| Timeoff > Requests | Timeoff |
| Timeoff > See who's out today | Timeoff |
Step 3: Log in to Compt and link your Hibob account
-
Log in to Compt, click on Stipend Admin → Company Settings, and scroll down to Employee Sync Integration. Then click on Set up integration.


- Select Hibob from the list of providers

-
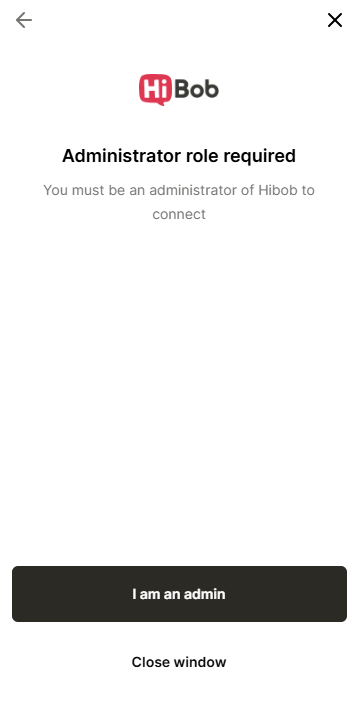
Confirm that you have Administrator Permissions for Hibob & click I am an admin.
-
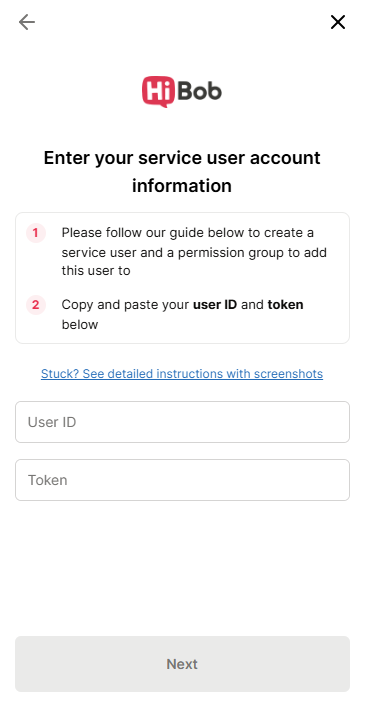
Copy & Paste the Service Account User ID & Token created in Part 1 into the User ID & Token field before clicking next.


Step 4: Confirm the sync
Once the information has been entered, you will see an option in Compt to trigger the employee sync.
It can take up to 30 minutes for the sync to be complete so make sure to check back that all of the information has been successfully transferred.